WordPress to WP Engine: Manual & CI Deploys with GitHub Actions
When working on WordPress projects as a team, it is pretty common to run into issues figuring out how to keep everyone on the same page without working alone. Managing your team’s workflow and avoiding deployment headaches—especially when pushing updates to the cloud—can be tricky.
In this guide, we will look at how to handle deployments to WP Engine using GitHub Actions, both manually and with continuous integration, so your team can work smoothly and avoid common problems.
WordPress & Local Environment Setup
Back in the day, people often used XAMPP with their own custom setups—like different PHP versions—which made things a bit messy and hard to get everyone on the same page.
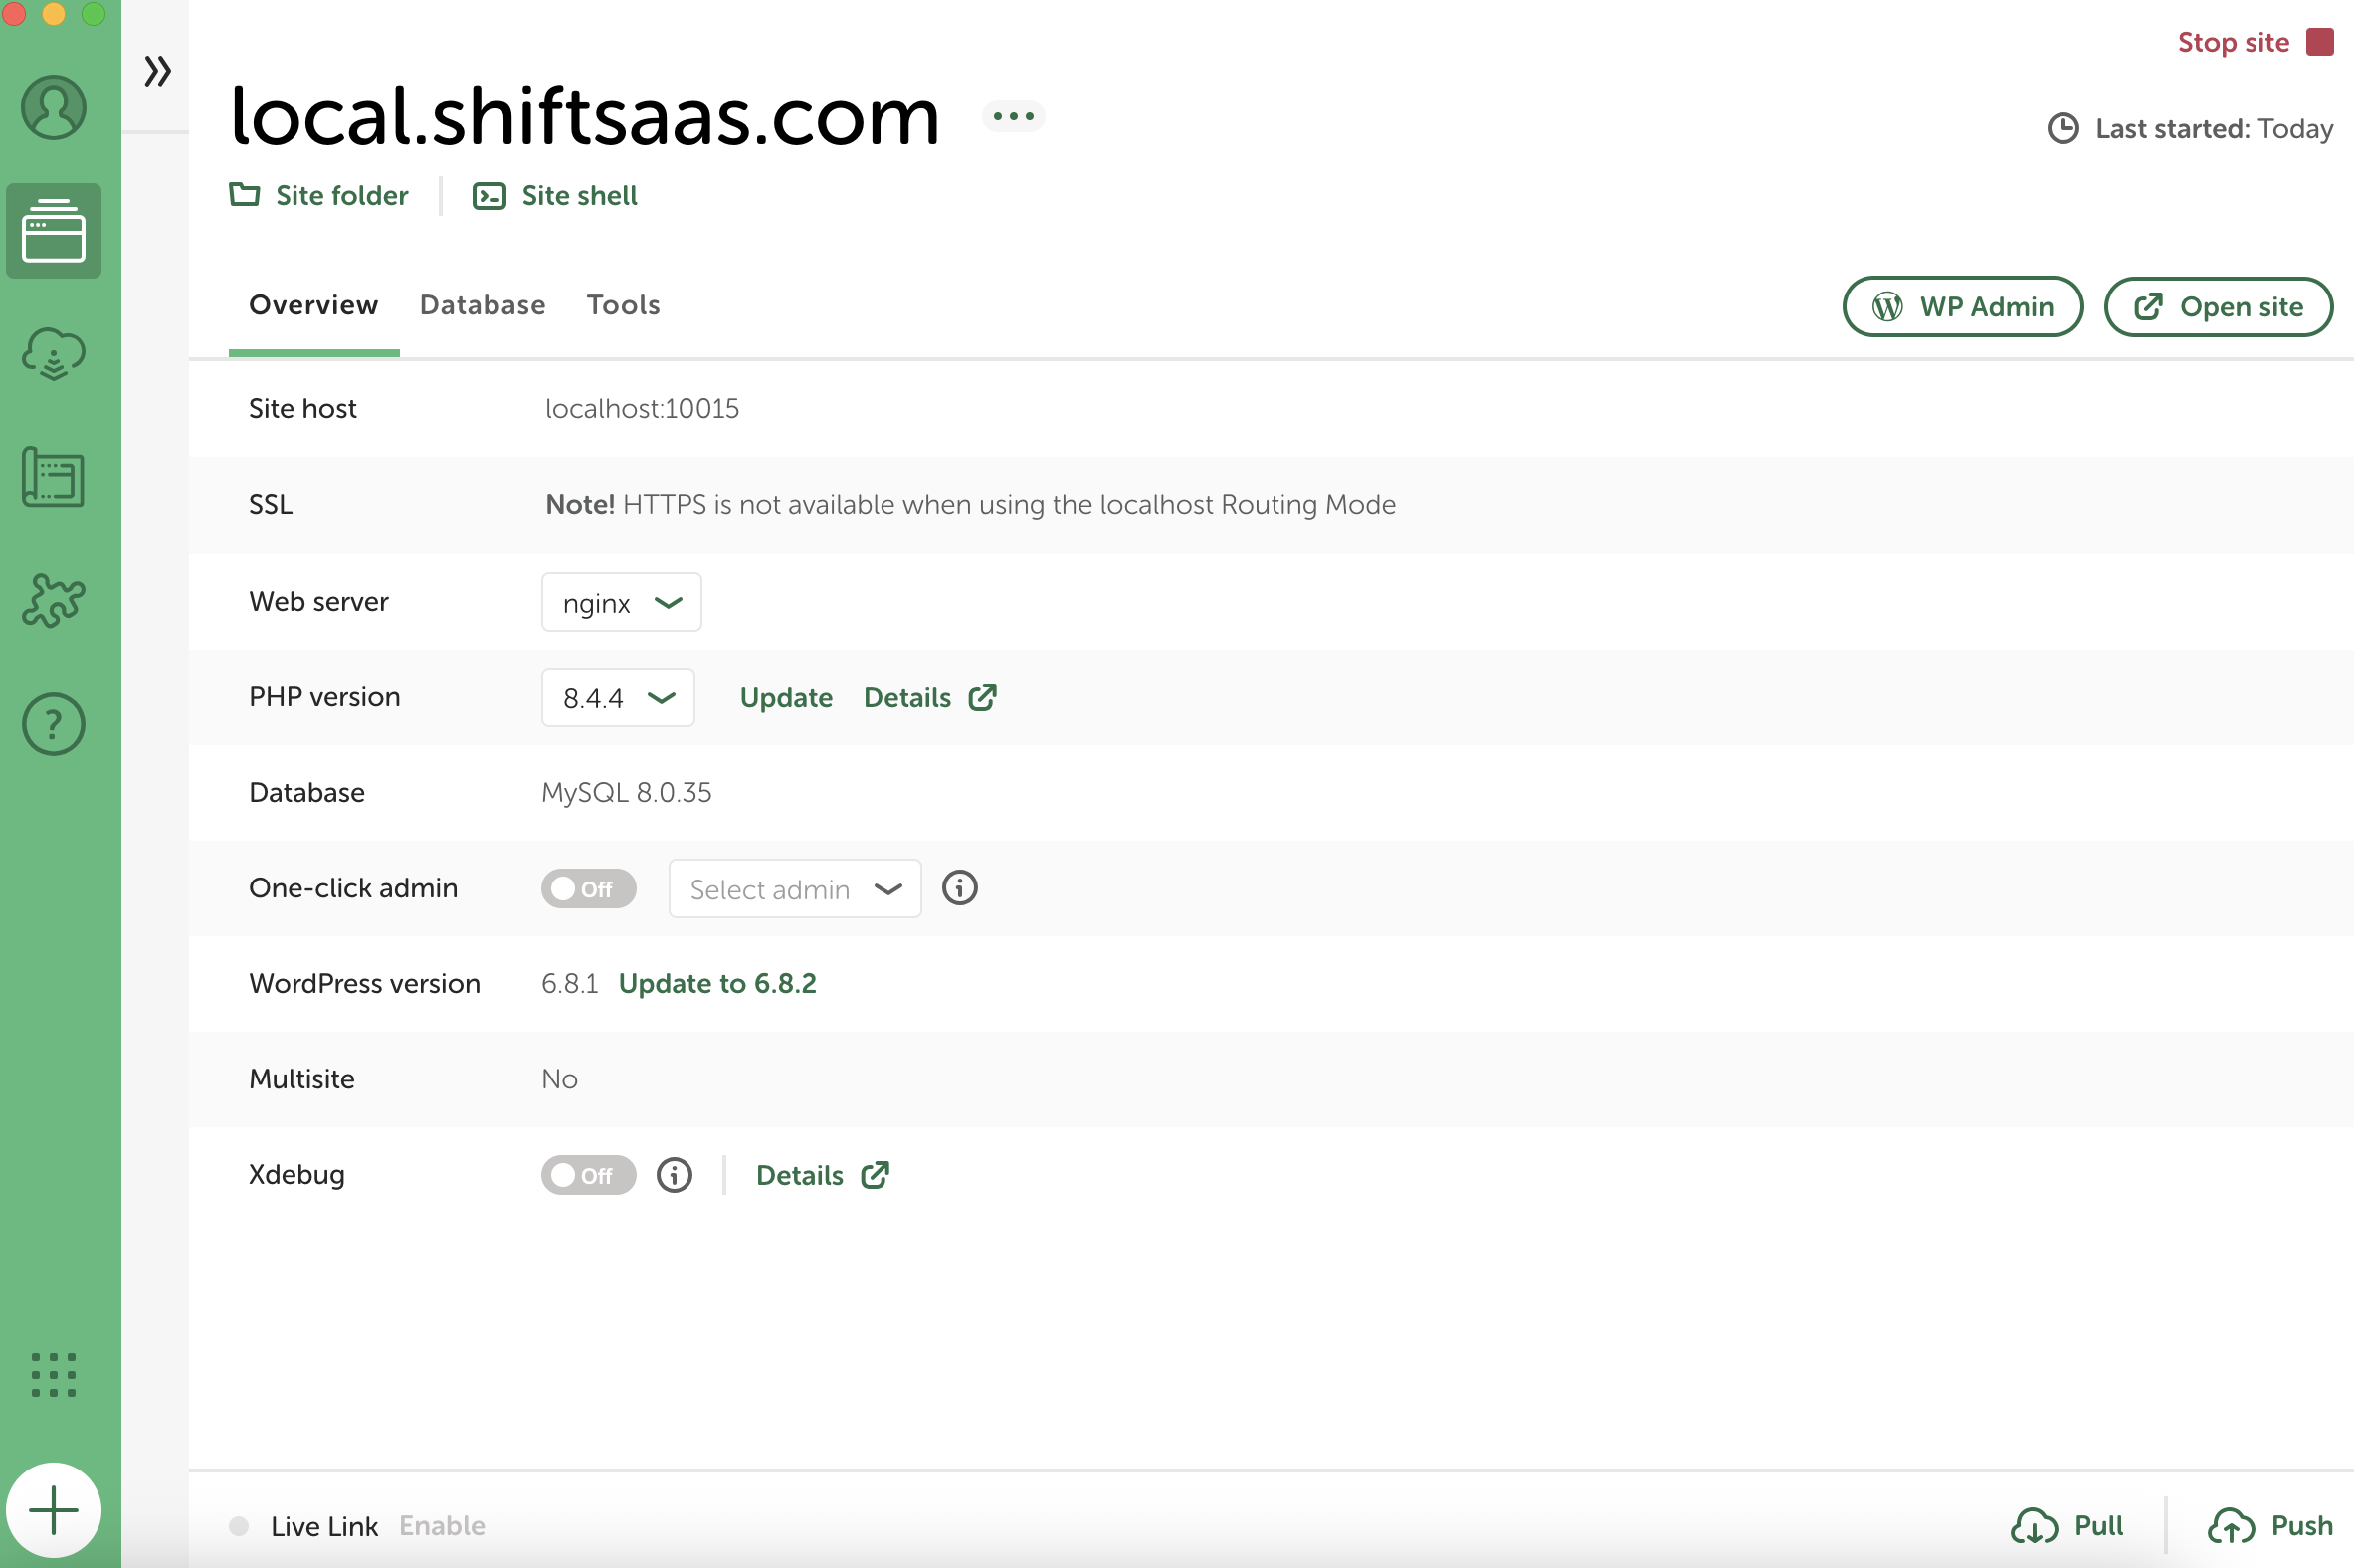
Now, with tools like Local, it is way simpler to set up a local WordPress site because all the settings are in one place, making local development a lot smoother.
Drop this website wpengine.com and get Local tool via https://localwp.com/, after installing it and see the screenshot as below, here is local.shiftsaas.com available for this website you are in shiftsaas.com.
The next step is to create a GitHub repository and configure SSH access keys (https://github.com/settings/keys) for local team members who need to access the repository. We will then add this Git repository to the source code, specifically isolating it within the public folder where the root WordPress project resides.

As you can see, we need to generate an RSA key pair: a private key and a public key. The public key will be added to the GitHub account to enable access, while the private key will remain on the local machine and is used to authenticate when connecting to the GitHub repository.
On macOS, this setup is commonly used and typically looks like this.
macbook@Macbooks-MacBook-Pro .ssh % ls -a
.			known_hosts.old
..		rsa
config rsa.pub
config.bak known_hostsRun the command below to generate a 4096-bit RSA key pair. Replace the email with yours. The keys will be saved as rsa and rsa.pub in ~/.ssh:
ssh-keygen -t rsa -b 4096 -C "[email protected]" -f ~/.ssh/rsaUsing SSH config which tells macOS to use specific key (rsa.pem) for GitHub and store the passphrase in the keychain for easier, secure access.
macbook@Macbooks-MacBook-Pro .ssh % cat config
Host github.com
  IdentityFile ~/.ssh/rsa.pem
  AddKeysToAgent yes
UseKeychain yesUsing command clears all loaded SSH keys, adds rsa as the active key, and tests the connection to GitHub over SSH.
ssh-add -D && ssh-add ~/.ssh/rsa && ssh -T git@github.comGit & GitHub Workflow for WordPress Projects
First, after making the repo on GitHub, We will connect it to our local WordPress folder from the path above. For example
macbook@Macbooks-MacBook-Pro public % pwd
/Users/macbook/Local Sites/localshiftsaascom/app/publicReplace your-username/your-repo.git with the URL of your GitHub repository, and update the SSH key path (~/.ssh/id_rsa) if your key is stored elsewhere.
git remote add origin git@github.com:your-username/your-repo.gitDecide which files shouldn’t be pushed to GitHub—like sensitive info or unnecessary files—and list them in the .gitignore file. Here is an example:
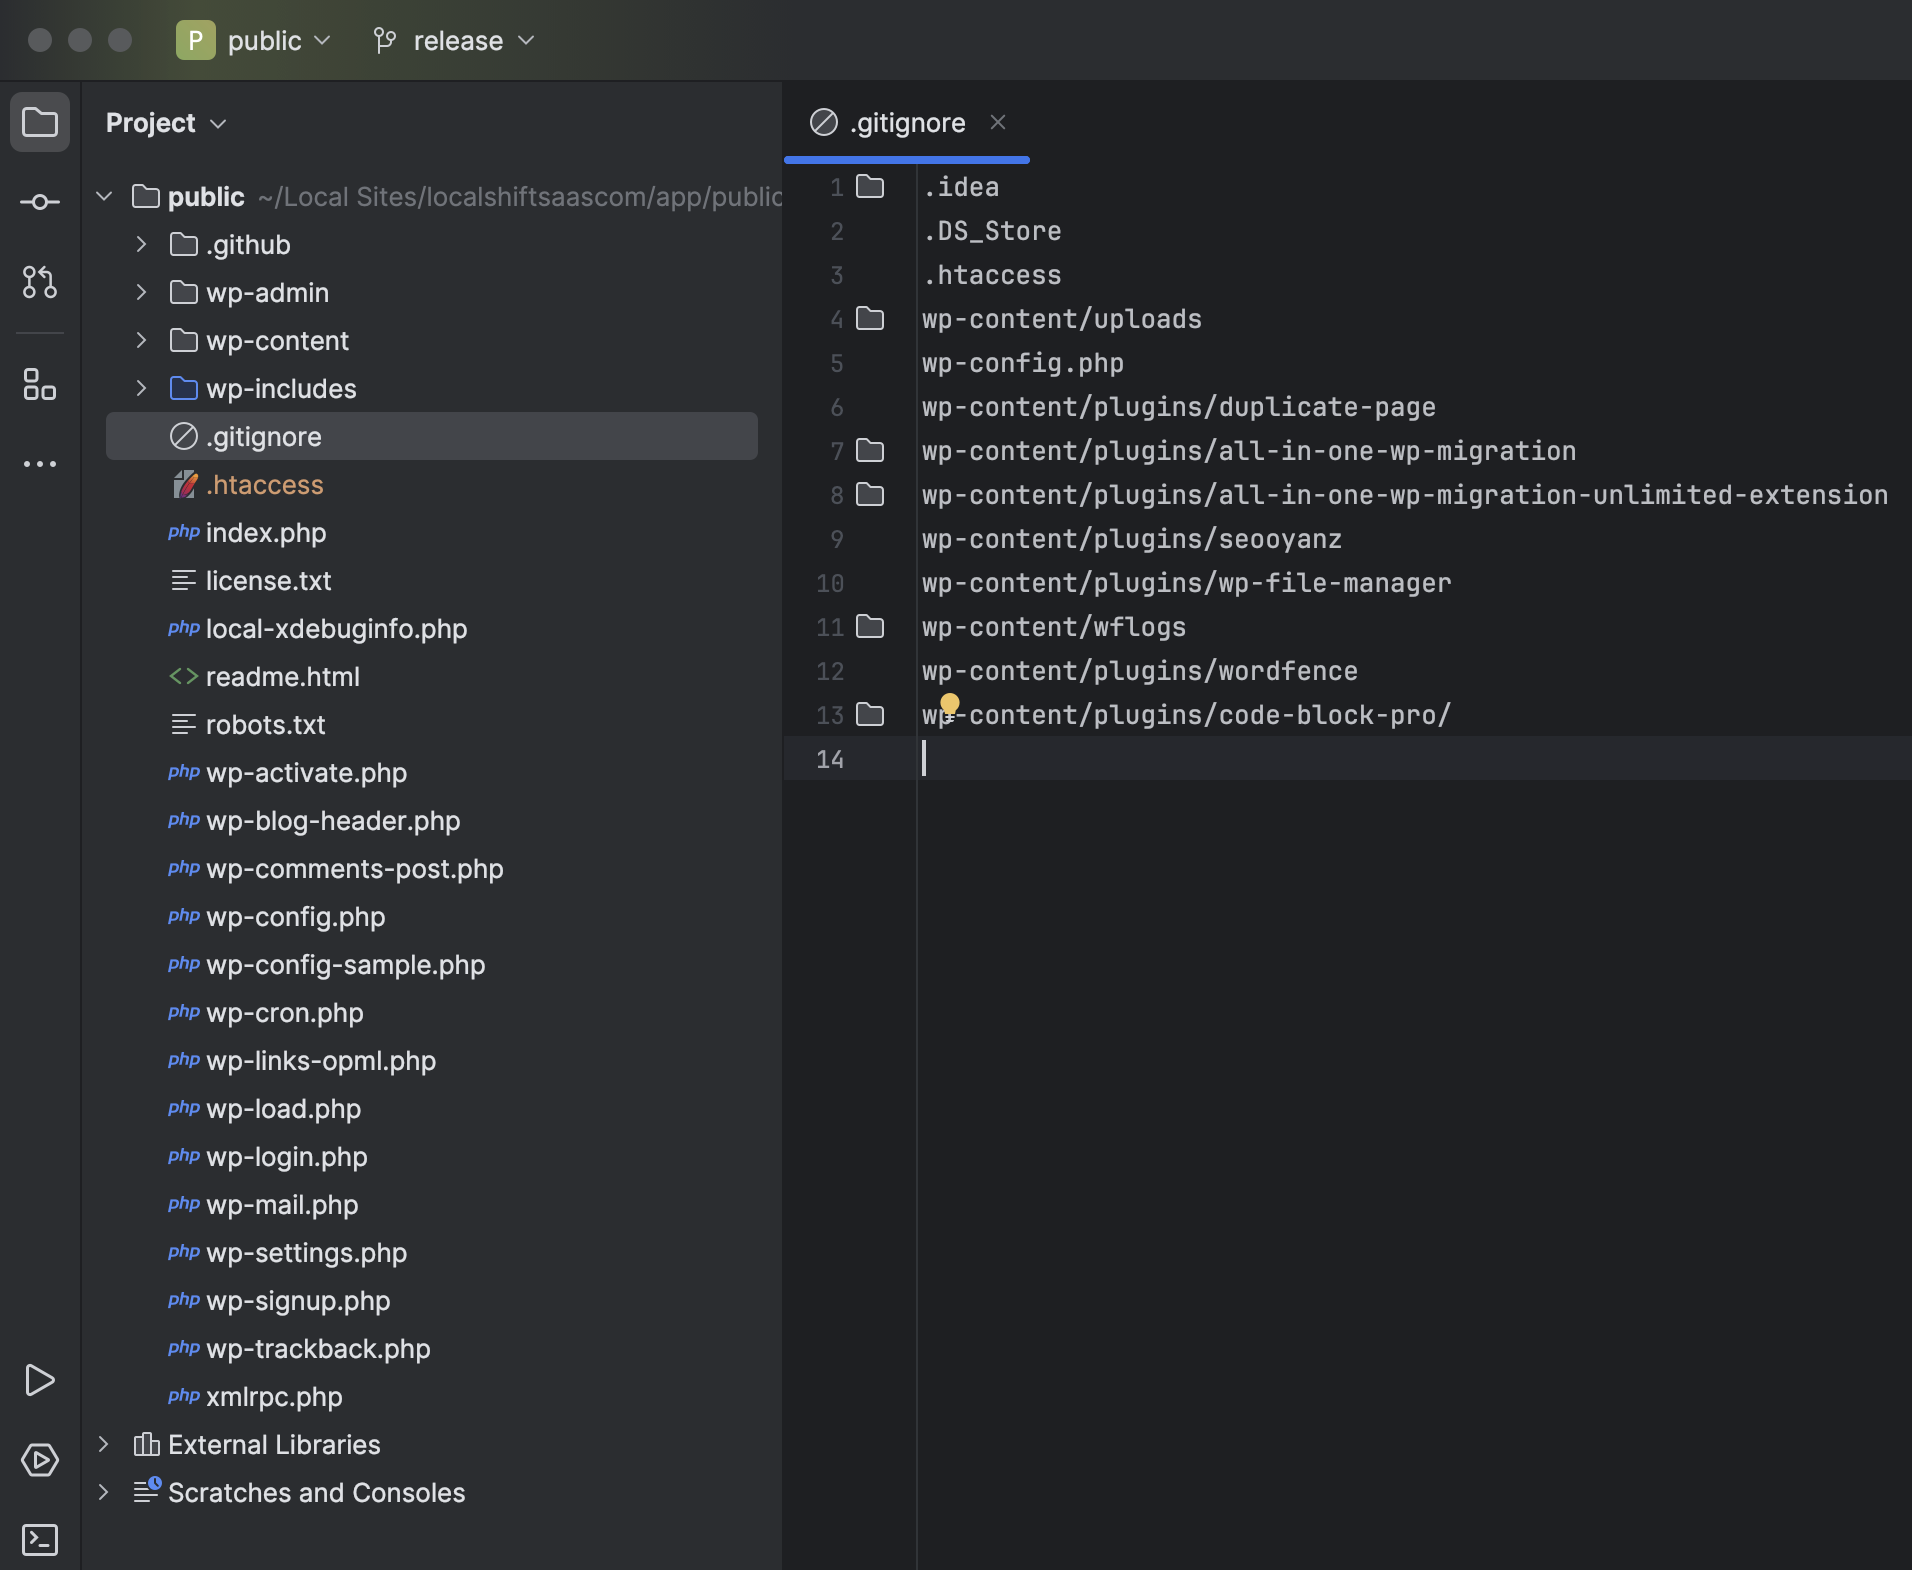
Cool, now that you have set up your .gitignore, go ahead and make your first commit — something like Initial project. This keeps your repo clean and avoids pushing stuff you don’t need.
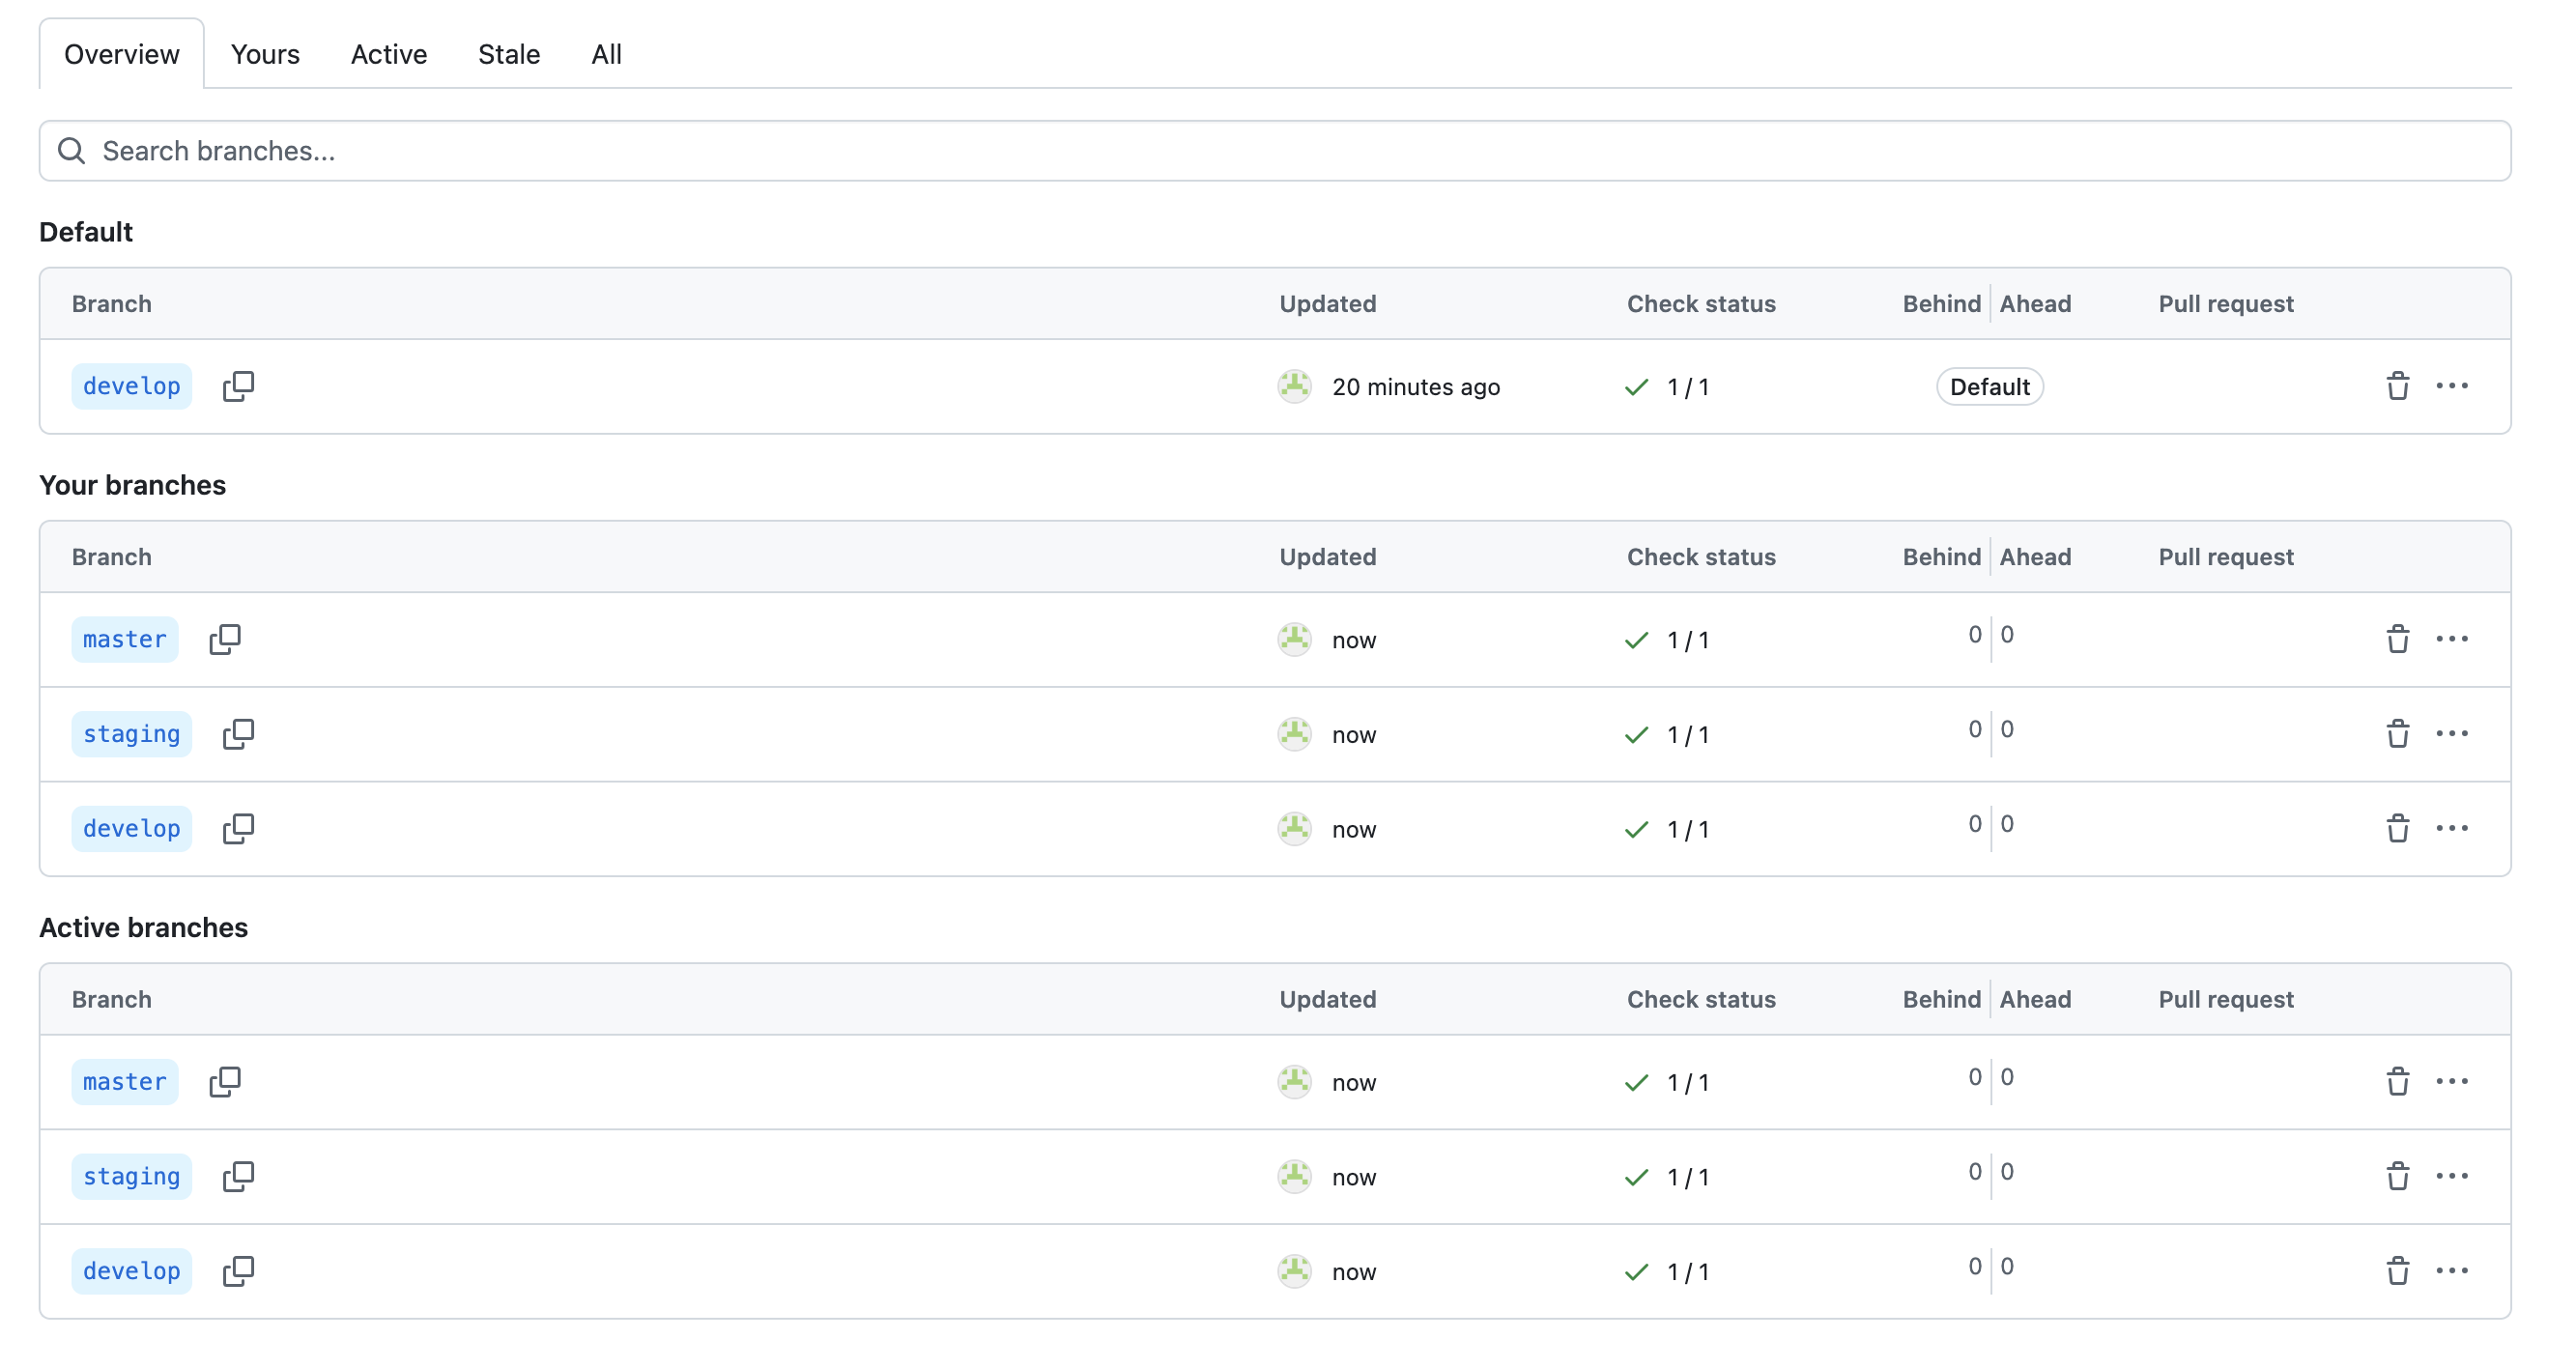
Once it is on GitHub, clone the repo into a new folder named after your project (like shiftsaas instead of just public). That folder will be your main project workspace where you can manage branches like develop, staging.”
We are using two Git remotes:
– origin s linked to the /app/public folder, which connects to WP Engine for deployment.
– shiftsaas is used in a separate folder to manage development work like pull requests, feature branches, and team contributions.
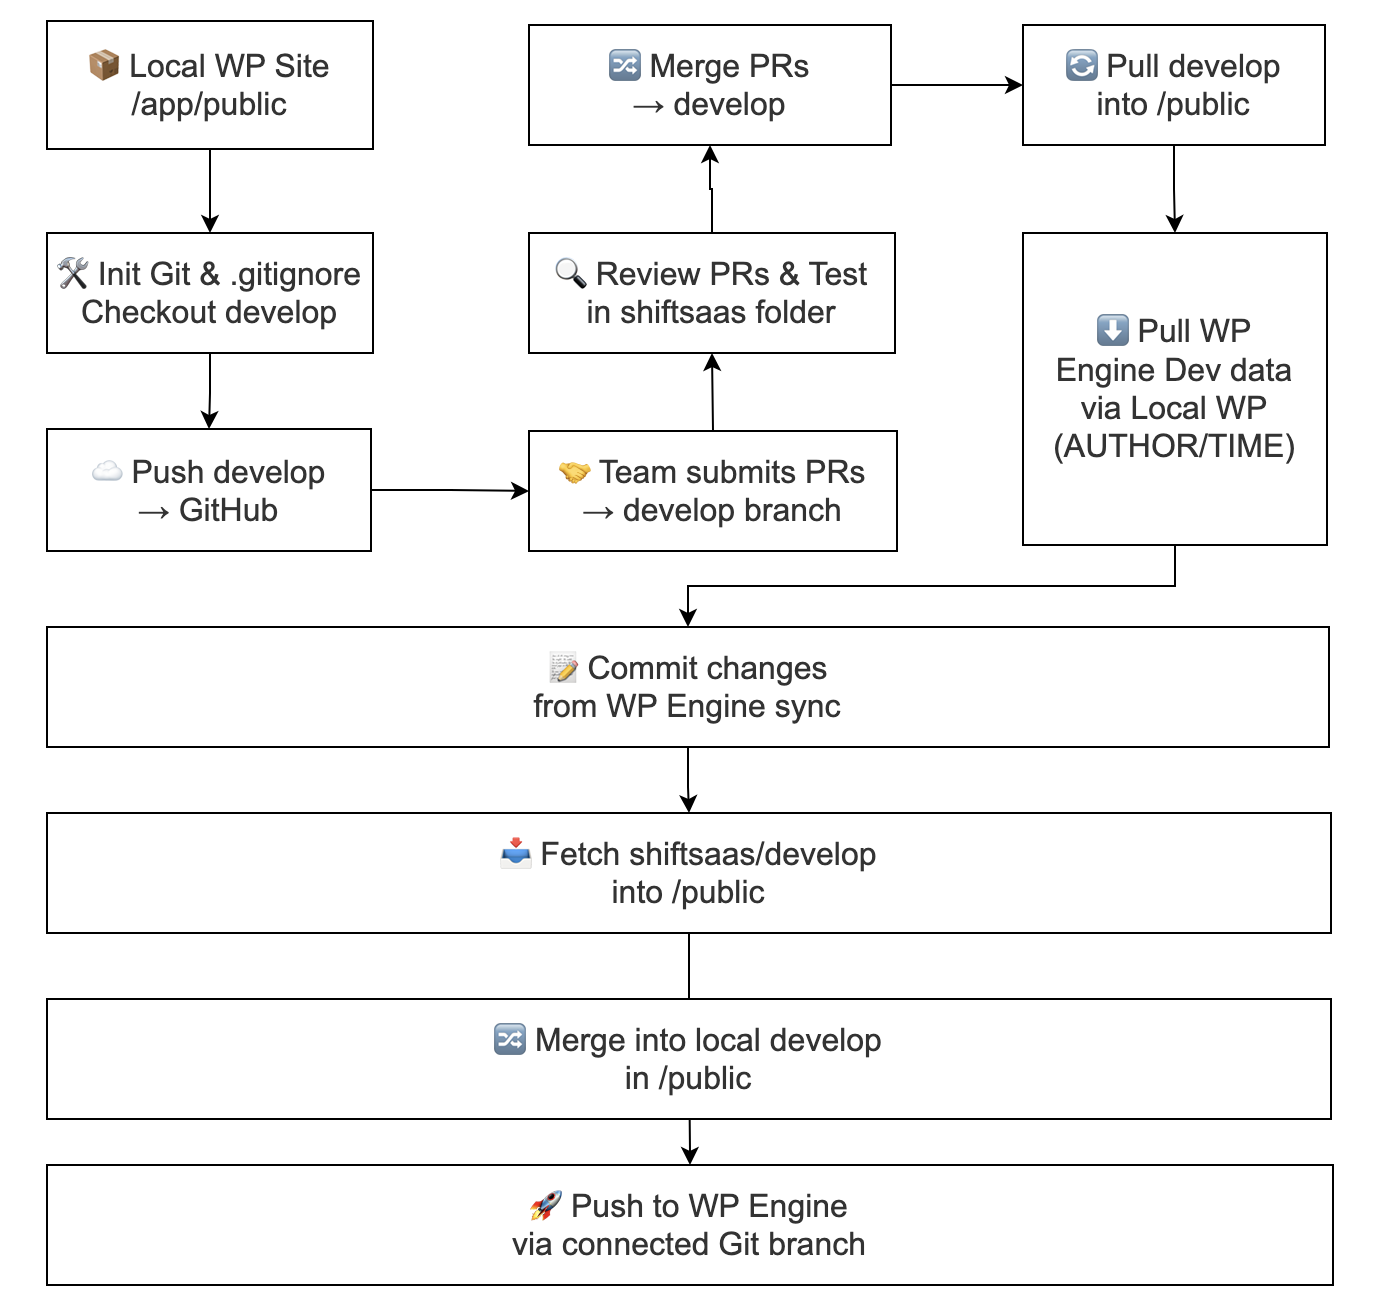
When pushing to a WP Engine environment (dev, staging, or production), work inside the site/app/public folder. Commit any changes from Local WP sync before pulling from shiftsaas/develop to avoid merge conflicts and keep your Git history clean. (Only files are pushed — database stays local).
Deploying from Development to Staging
In practice, we clone the repo or change the remote to shiftsaas to manage development on WP Engine. You can do the same with staging and master branches to handle staging and production environments.
Deploying to WP Engine Staging without affecting content or author data:
- Merge changes from
shiftsaas/developinto your localshiftsaas/stagingbranch. - Update your local
origin/stagingby pulling or fetching the latestshiftsaas/staging. - In Local WP’s
/app/publicfolder (connected to WP Engine), commit any unstaged changes such as synced files or database updates. - Push the clean
origin/stagingbranch to WP Engine through Local WP’s Git connection.
This workflow ensures that fixes from shiftsaas/develop propagate to staging and production, while environment-specific updates are committed locally and merged back into the central repository as needed.

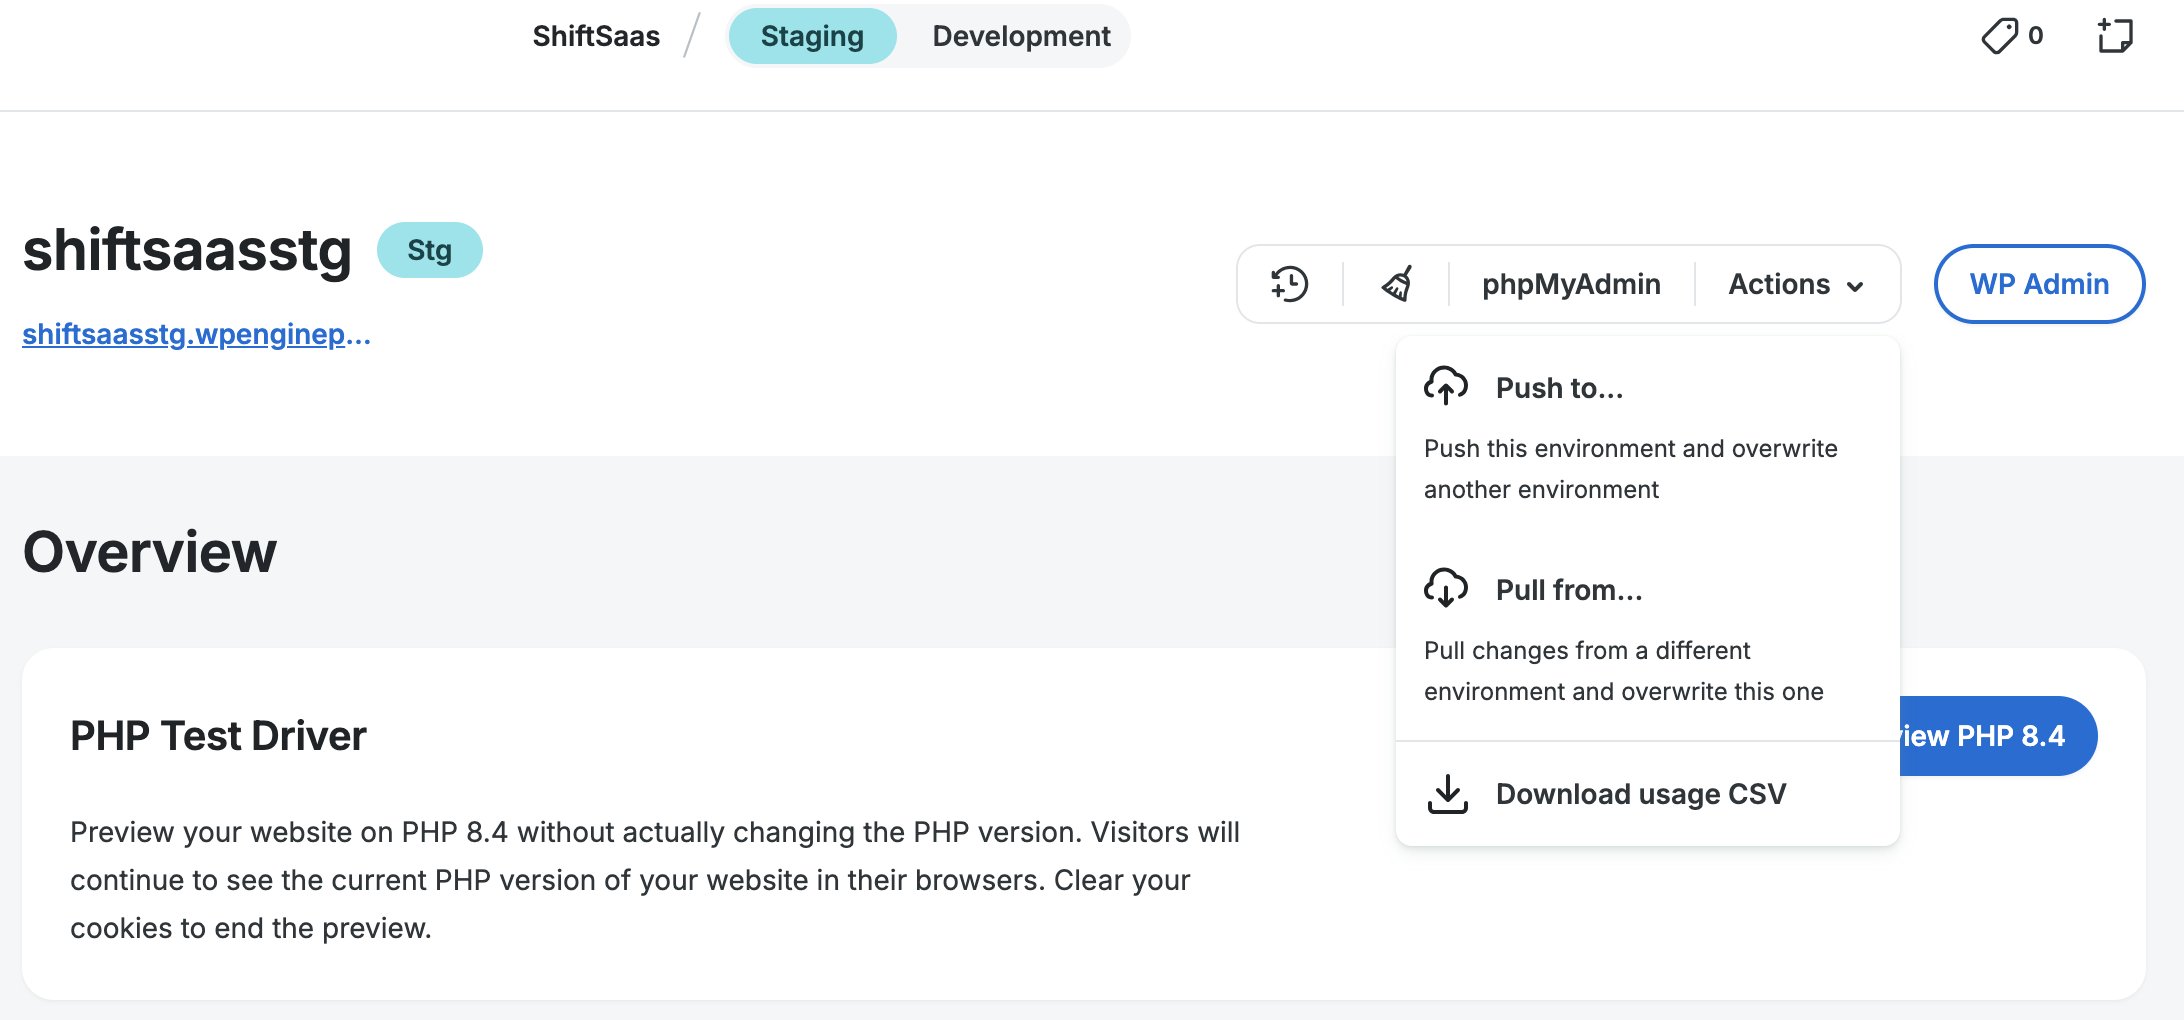
What about deploying to production?
Since staging is usually a copy of production, moving code over doesn’t have to be complicated. WP Engine makes it easier—you can just use the clone environment feature to copy everything from staging to production without doing a manual deploy.
CI Deploys with GitHub Actions
For CI deploys with GitHub Actions, you should generally work with the shiftsaas folder (the central project repo).
Why?
- The
shiftsaasfolder is the main Git repo where the team collaborates: all PRs, merges, and branch management happen here. - GitHub Actions triggers run on the central repository (i.e.,
shiftsaas), not on your localapp/site/publicfolder. - Your
app/site/publicfolder is mainly for local development and syncing with WP Engine environments but isn’t the source for automated CI workflows.
Having the following structure:
.github
├── scripts
│   └── deploy.sh
└── workflows
    └── deploy-cms.yml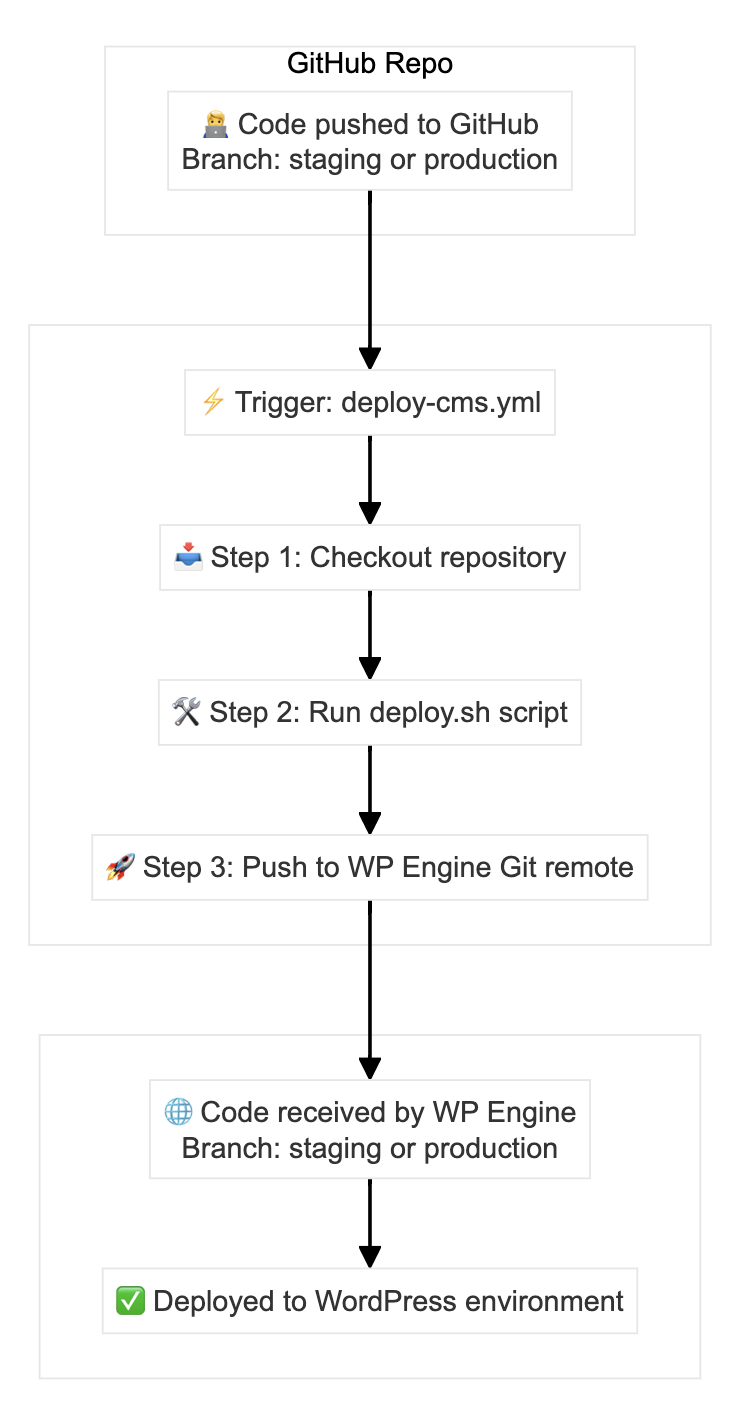
Git Remote SSH Alias Setup
Use the command:
git remote set-url shiftsaas [email protected]:your-username/your-repo.gitto set up the remote repository for app/site/public, so it can trigger actions (like builds or deployments) on every push.
To sync changes from the remote branch:
git fetch origin
git merge origin/developTo deploy changes, push manually using the Local WP Engine tool.
Instead of pushing to the default origin, we push changes to a GitHub repository that has CI/CD set up. This setup automatically pulls the latest code and runs the deployment process on WP Engine.
We support two ways to handle this:
- From
app/site/public(controlled byshiftsaas) - From another local path linked to the GitHub repository (controlled by
origin)
These paths can include files like .xml and .sh to help trigger or support the deployment process.
.github/workflows/deploy-cms.yml
name: 🚀 Deploy to WP Engine

on:
  push:
    branches:
      - staging
      - production

jobs:
  deploy:
    name: Deploy to WP Engine
    runs-on: ubuntu-latest

    steps:
      - name: ⬇️ Checkout Repository
        uses: actions/checkout@v4

      - name: 🛠️ Set Up SSH
        uses: webfactory/ssh-agent@v0.8.0
        with:
          ssh-private-key: ${{ secrets.WPENGINE_SSH_KEY }}

      - name: 🚀 Run Deploy Script
        run: bash .github/scripts/deploy.sh
Continue…